
Are you tired of your MacBook Air locking too quickly or staying unlocked for too long? Changing the auto lock settings can make a big difference in how you use your laptop every day.
Whether you want to boost your security or save time, adjusting this feature is easier than you think. In this guide, you’ll learn exactly how to change the auto lock on your MacBook Air step by step. Keep reading to take full control of your Mac’s screen locking and make it work perfectly for you.
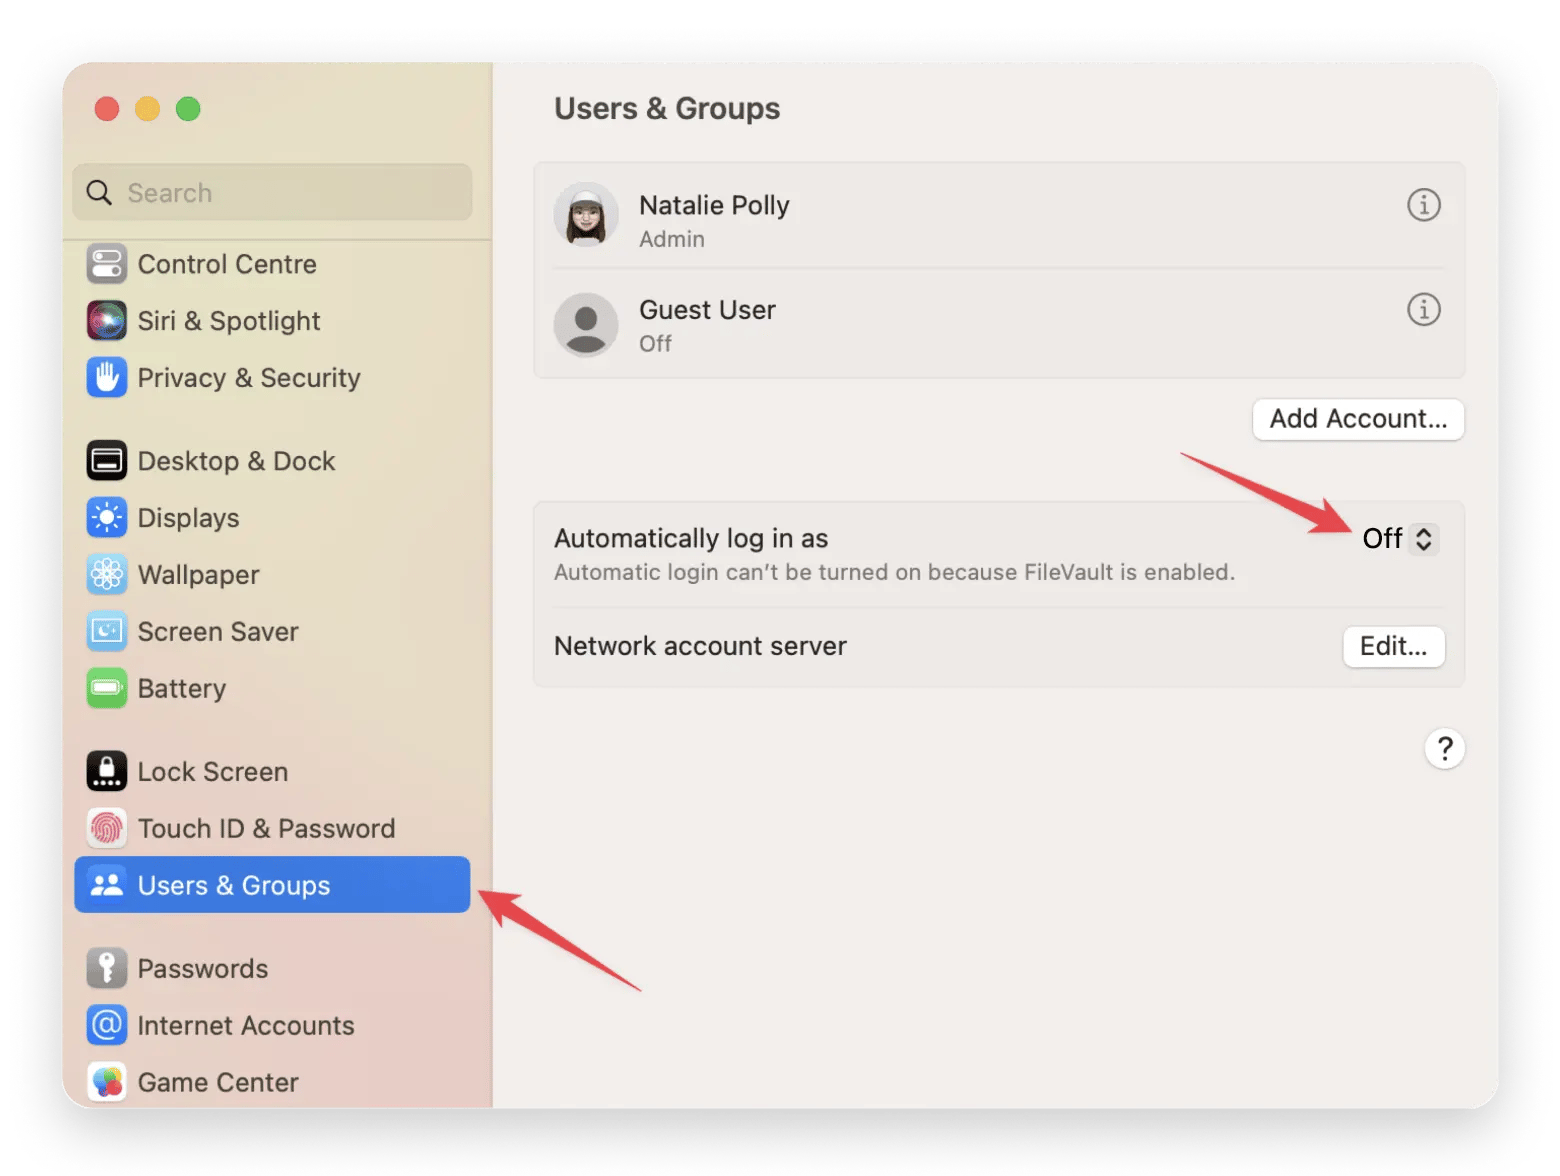
Credit: setapp.com
Auto Lock Basics
Auto Lock is a feature on your MacBook Air that helps protect your data. It locks your screen after a set time of inactivity.
You can change the Auto Lock settings to fit how you use your MacBook Air. This makes your device more secure or easier to access.
What Auto Lock Does
Auto Lock automatically locks your MacBook Air after you stop using it. This keeps your information safe if you leave your computer unattended.
When your MacBook locks, you must enter your password or use Touch ID to unlock it. This stops others from using your device without permission.
Why Adjust Auto Lock Settings
Adjusting Auto Lock lets you control how fast your MacBook Air locks. You can set it to lock quickly for more security.
You might want a longer Auto Lock time if you need to keep your MacBook unlocked while working. Changing settings helps balance security and convenience.
- Short Auto Lock time improves device security
- Longer Auto Lock time helps with continuous work
- Custom settings fit your personal needs
Accessing Security Settings
Changing the auto lock time on your MacBook Air helps protect your data. You need to access security settings first.
This guide shows you how to open the right settings on your Mac.
Opening System Preferences
Start by opening System Preferences on your MacBook Air. This is where you change most settings.
Click the Apple icon in the top-left corner. Select “System Preferences” from the menu.
- Click the Apple menu () at the screen’s top-left
- Choose “System Preferences” from the dropdown
- Wait for the preferences window to open
Navigating To Security & Privacy
In System Preferences, find the “Security & Privacy” icon. It controls your Mac’s security features.
Click “Security & Privacy” to open its settings. Here, you can adjust auto lock options.
- Locate and click “Security & Privacy” in System Preferences
- Go to the “General” tab for lock settings
- Unlock the panel by clicking the lock icon if needed
Modifying Auto Lock Time
Changing the auto lock time on your MacBook Air helps control when your screen locks. This can save battery and keep your data safe.
You can adjust settings for display sleep and screen saver password to set the auto lock time that fits your needs.
Changing Display Sleep Timer
To change the display sleep timer, open System Preferences and go to Energy Saver or Battery settings. Here you can set how long the screen stays on when inactive.
- Click the Apple menu and select System Preferences.
- Choose Battery or Energy Saver.
- Find the “Turn display off after” slider.
- Move the slider to set the desired time.
- Close the window to save changes.
Setting Screen Saver Password
Setting a screen saver password adds security by requiring a password to unlock after the screen locks.
| Action | How to Do It | Effect |
| Enable Password | Go to System Preferences > Security & Privacy > General | Requires password after screen saver starts |
| Set Delay Time | Choose time interval for password prompt | Controls how soon password is needed after sleep |
| Turn On Screen Saver | System Preferences > Desktop & Screen Saver | Starts screen saver after set time |
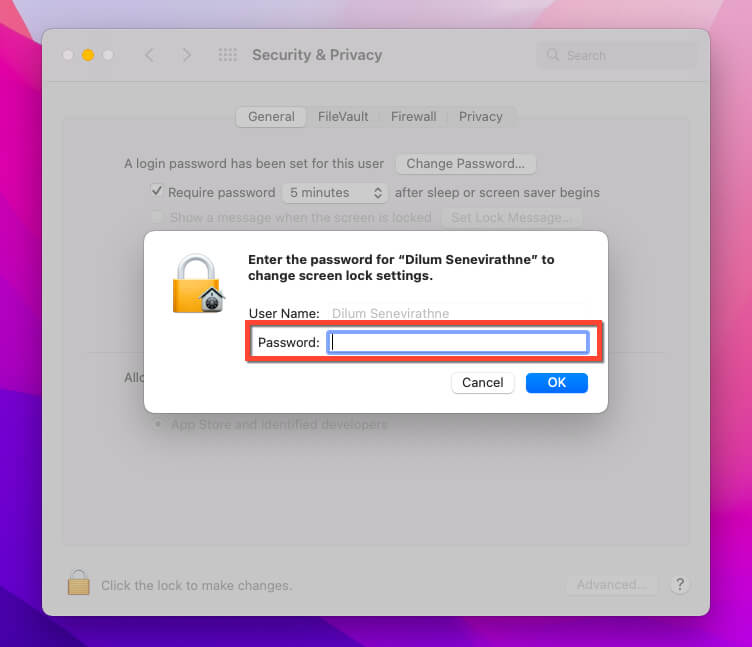
Credit: www.switchingtomac.com
Using Energy Saver For Auto Lock
You can change the auto lock settings on your MacBook Air using Energy Saver. This tool helps manage when your computer goes to sleep.
Adjusting these settings lets you control how soon your Mac locks itself after inactivity. This can save power and protect your data.
Adjusting Energy Saver Preferences
Open System Preferences and select Energy Saver. Here, you will see options to set the display sleep time. This controls when your MacBook screen turns off and auto locks.
- Drag the slider to set the display sleep time.
- Choose a shorter time to lock faster.
- Choose a longer time to keep it active.
- Check “Prevent computer from sleeping automatically” to keep it awake.
Impact On Battery And Performance
Changing auto lock settings affects your MacBook’s battery life and speed. Shorter sleep times save battery but may interrupt work.
| Setting | Battery Impact | Performance Effect |
| Short Sleep Time | More battery saved | May pause apps often |
| Long Sleep Time | Less battery saved | Better for continuous work |
| No Sleep | High battery use | Runs apps without interruption |
Setting Hot Corners For Quick Lock
Hot Corners let you lock your MacBook Air screen fast. You set a corner to start the lock or screen saver. This makes locking your device quick and easy.
Follow the steps below to set Hot Corners on your MacBook Air. This guide helps you secure your laptop without waiting for the auto-lock timer.
Configuring Hot Corners
To set up Hot Corners, open System Preferences and find the Desktop & Screen Saver section. From there, you can choose actions for each corner of your screen.
- Click the Apple menu and select System Preferences.
- Choose Desktop & Screen Saver.
- Click the Screen Saver tab.
- Press the Hot Corners button in the bottom right.
- Pick a corner and select “Put Display to Sleep” or “Start Screen Saver”.
- Click OK to save your settings.
Activating Screen Saver Instantly
Once Hot Corners are set, move your cursor to the chosen corner. This action activates the screen saver or locks your screen immediately.
| Hot Corner Action | Effect |
| Put Display to Sleep | Locks screen and saves power |
| Start Screen Saver | Shows screen saver and locks screen |
| Disable Screen Saver | No action taken |
Troubleshooting Auto Lock Issues
Auto Lock on your MacBook Air helps keep your device secure. Sometimes, you may face issues with this feature.
This guide will help you identify and fix common problems related to Auto Lock settings.
Common Problems And Fixes
Many users experience Auto Lock not functioning as expected. Below is a list of common problems and their solutions.
- Auto Lock not activating: Check if the feature is enabled in System Preferences.
- Delay in locking: Ensure that the timer is set correctly under Security & Privacy settings.
- Auto Lock disabling itself: This might require a system update or a restart.
Resetting Security Settings
If Auto Lock issues persist, resetting security settings may help. This process can resolve configuration errors.
To reset, follow these steps:
- Open System Preferences.
- Select Security & Privacy.
- Click the lock icon and enter your password to make changes.
- Reset settings to default.
After resetting, check if Auto Lock functions correctly. This should fix most problems with security settings.
Enhancing Device Security
Keeping your MacBook Air secure is important. Changing auto lock settings helps protect your information.
Learn how to use Touch ID and enable FileVault for better security.
Using Touch Id For Locking
Touch ID adds a layer of security to your MacBook Air. It uses your fingerprint to lock and unlock the device.
- Go to System Preferences.
- Select Touch ID.
- Follow the prompts to add your fingerprint.
Enabling Filevault Encryption
FileVault encrypts your disk to protect your data. It makes sure your files are safe from unwanted access.
| Step | Action |
| 1 | Open System Preferences. |
| 2 | Click on Security & Privacy. |
| 3 | Select the FileVault tab. |
| 4 | Click Turn On FileVault. |

Credit: www.idownloadblog.com
Frequently Asked Questions
How Do I Change Auto Lock Time On Macbook Air?
To change auto lock time, open System Preferences. Click on “Security & Privacy,” then go to the “General” tab. Adjust the “Require password” timer after sleep or screen saver begins.
Can I Disable Auto Lock On My Macbook Air?
Yes, you can disable auto lock by setting the password requirement to “Immediately” or turning off the option in System Preferences under “Security & Privacy. “
What Affects Auto Lock Settings On Macbook Air?
Auto lock settings depend on screen saver activation and sleep mode. Changes in “Energy Saver” and “Security & Privacy” preferences affect auto lock timing.
How To Extend Auto Lock Duration On Macbook Air?
To extend auto lock duration, increase the time interval under “Require password” in “Security & Privacy” settings. This delays the lock after sleep or screen saver.
Conclusion
Changing the auto lock on your MacBook Air is quick and simple. Adjust the settings to fit your needs and save time. A customized lock time helps keep your device secure. You control when your MacBook goes to sleep or locks.
Try different settings until you find the best one. This small change improves your daily use and safety. Keep your MacBook Air working just the way you want.