
If your car’s brakes feel soft or spongy, it could mean there’s air trapped in the brake lines. This can make stopping dangerous and put you at risk on the road.
Knowing how to bleed your auto brakes yourself can save you time and money, and give you peace of mind that your brakes are working properly. In this guide, you’ll learn simple, step-by-step instructions to get your brakes back to peak performance.
Keep reading—your safety depends on it.

Credit: www.youtube.com
Why Bleed Auto Brakes
Bleeding auto brakes removes air from the brake lines. Air reduces brake system efficiency. It helps keep your brakes working safely and smoothly.
Regular brake bleeding keeps your vehicle safe. It also prevents damage to brake parts over time. Knowing when and why to bleed brakes is important.
Signs Of Air In Brake Lines
Air in brake lines causes several noticeable problems. These signs show that your brakes need bleeding soon.
- Spongy or soft brake pedal feel
- Brake pedal sinks to the floor
- Longer stopping distances
- Unusual noises when braking
- Brake warning light on dashboard
Impact On Brake Performance
Air bubbles reduce brake fluid pressure. This makes braking less effective and unsafe. Your car may take longer to stop.
| Effect | Description |
| Reduced Pressure | Air compresses, lowering brake fluid force |
| Delayed Response | Brakes react slower to pedal input |
| Increased Wear | Brake parts wear faster due to uneven pressure |
| Safety Risk | Higher chance of brake failure in emergencies |
Tools And Materials Needed
Bleeding auto brakes requires the right tools and materials. Using proper items ensures safety and effectiveness. Prepare everything before starting the job.
This guide covers the types of brake fluid and the essential tools list. Knowing these helps you complete the task smoothly.
Brake Fluid Types
Brake fluid is key to brake system function. Different types fit different vehicles. Choose the correct type to avoid damage and ensure safety.
| Type | Description | Common Use |
| DOT 3 | Glycol-based, good for normal cars | Most passenger vehicles |
| DOT 4 | Higher boiling point than DOT 3 | Modern cars with ABS |
| DOT 5 | Silicone-based, does not absorb water | Classic cars, some motorcycles |
| DOT 5.1 | Glycol-based, high performance | High-performance vehicles |
Essential Tools List
Having the right tools makes bleeding brakes easier. These tools help you remove old fluid and check your work.
- Brake fluid compatible with your car
- Wrench or brake bleeder wrench
- Clear plastic tubing
- Catch container for old fluid
- Jack and jack stands
- Gloves and safety glasses
- Clean rags or paper towels
- Assistant to press the brake pedal
Preparation Steps
Bleeding auto brakes removes air from the brake lines. This process improves brake performance and safety. Proper preparation helps the job go smoothly.
Before you start, get your tools ready and find a clean, flat workspace. Follow the steps below to prepare your vehicle for brake bleeding.
Safety Precautions
Brake fluid is toxic and can harm your skin and eyes. Always wear gloves and safety glasses. Work in a well-ventilated area to avoid fumes.
Keep brake fluid away from painted surfaces. It can damage the paint. Clean any spills immediately with water.
- Wear gloves and safety glasses
- Work in a ventilated space
- Avoid contact with skin and eyes
- Protect painted surfaces from spills
- Have rags or towels ready for cleanup
Vehicle Positioning
Park your vehicle on a flat, stable surface. This helps keep the brake fluid level steady during bleeding. Use wheel chocks to stop the car from moving.
Turn off the engine and set the parking brake. This keeps the vehicle safe while you work on the brakes.
- Find a flat surface
- Use wheel chocks on the opposite wheels
- Turn off the engine
- Engage the parking brake
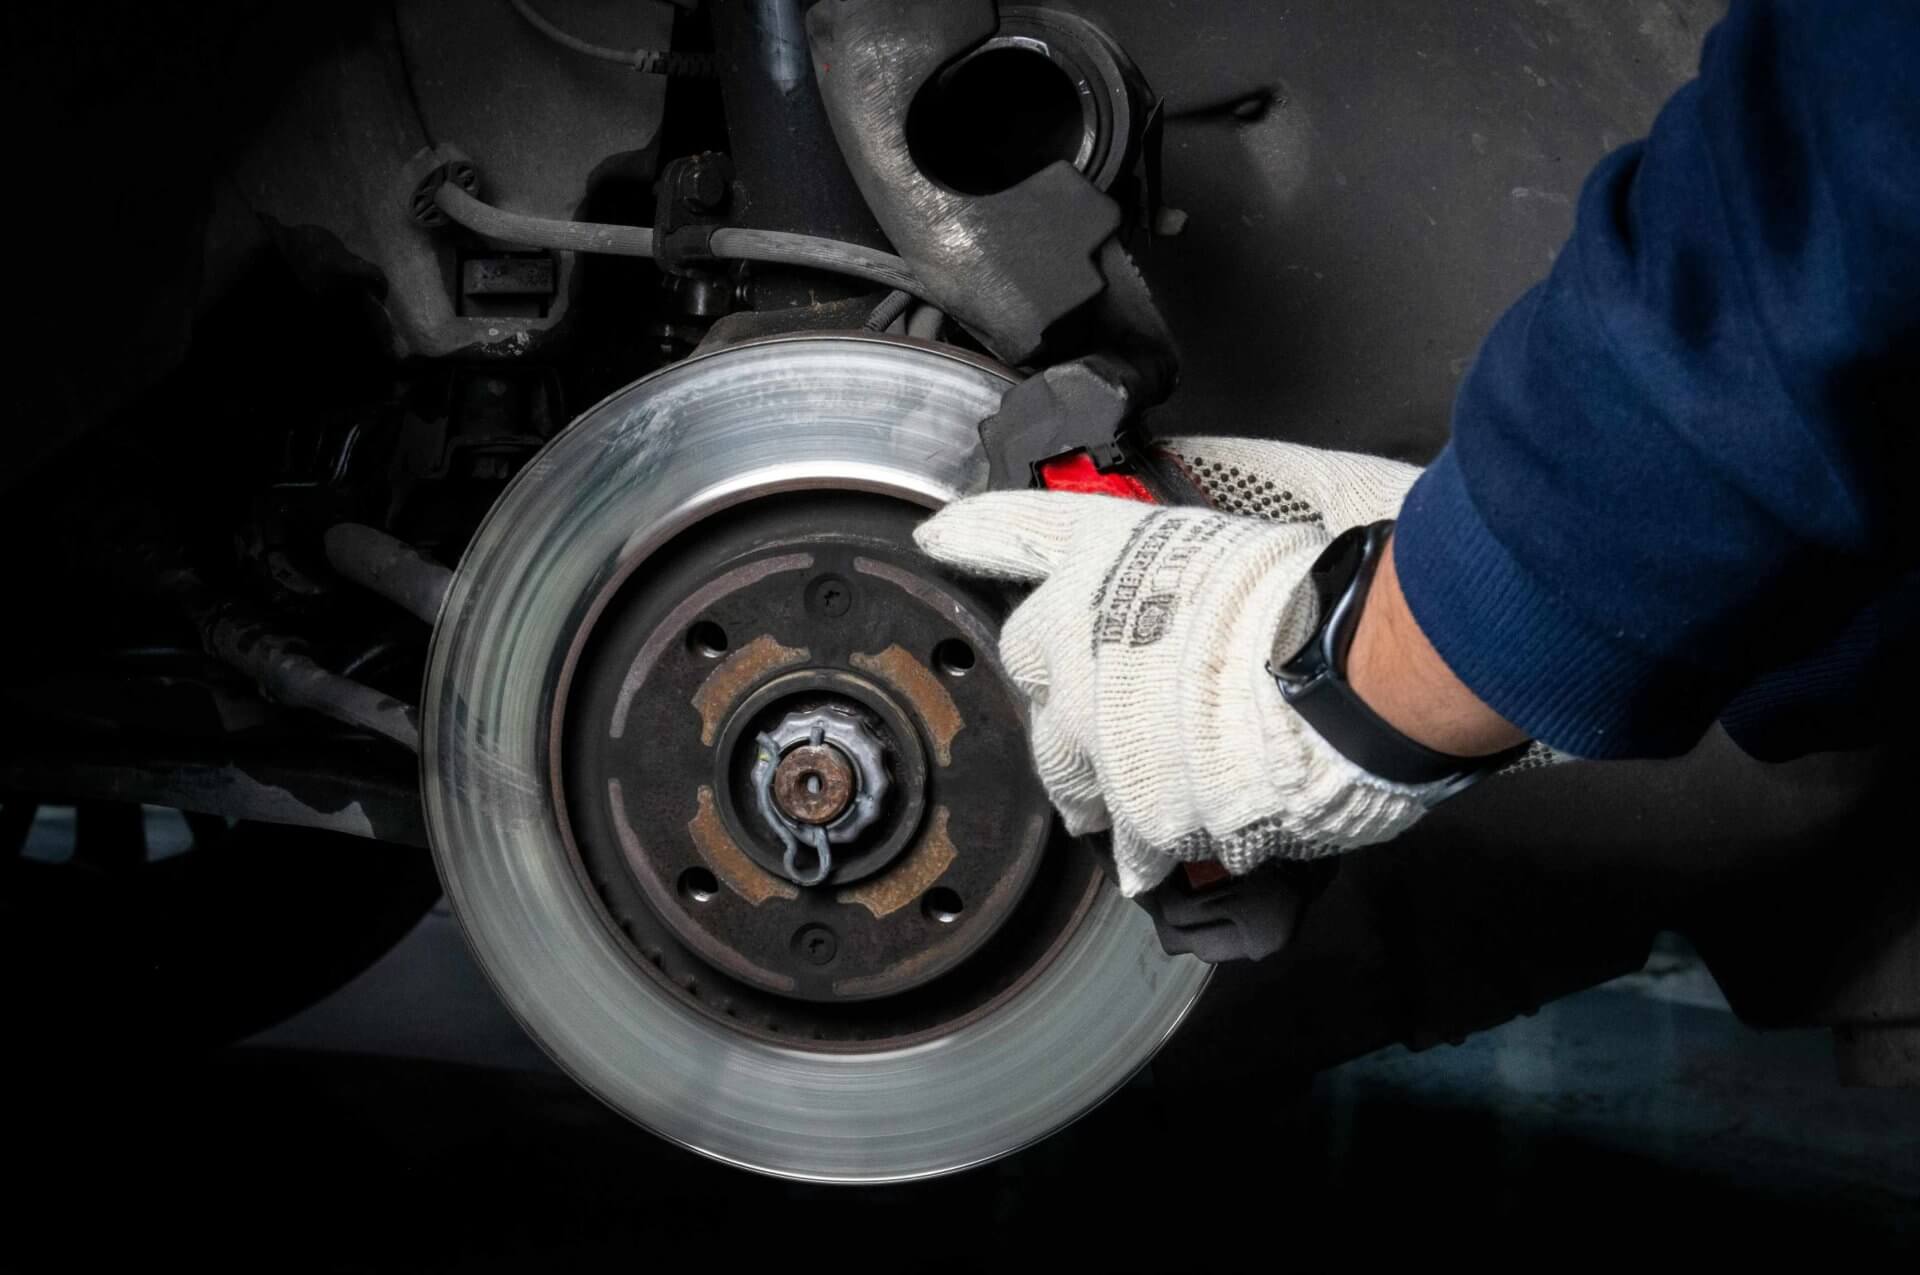
Accessing Brake Components
Remove the wheels to reach the brake calipers or wheel cylinders. This gives you clear access to the bleeder valves. Use a jack and jack stands to lift and secure the vehicle safely.
Locate the brake fluid reservoir under the hood. Make sure it is full before starting the bleeding process. Keep the cap loose but on to avoid dirt getting inside.
- Lift the car with a jack
- Secure it with jack stands
- Remove wheels for better access
- Find the brake fluid reservoir
- Check and top up brake fluid
Bleeding Methods
Bleeding auto brakes removes air from the brake lines. Air can cause soft or spongy brakes. Several methods help clear the air for safe braking.
Each bleeding method uses different tools and steps. Choose the right one for your car and tools available.
Manual Bleeding
Manual bleeding is the simplest way to remove air. You use a wrench and a clear tube to push brake fluid through the lines.
One person presses the brake pedal while another opens and closes the bleed valve. This forces air out with brake fluid.
- Attach clear tube to bleed valve
- Have helper press brake pedal slowly
- Open bleed valve to release air and fluid
- Close valve before pedal is released
- Repeat until no air bubbles appear
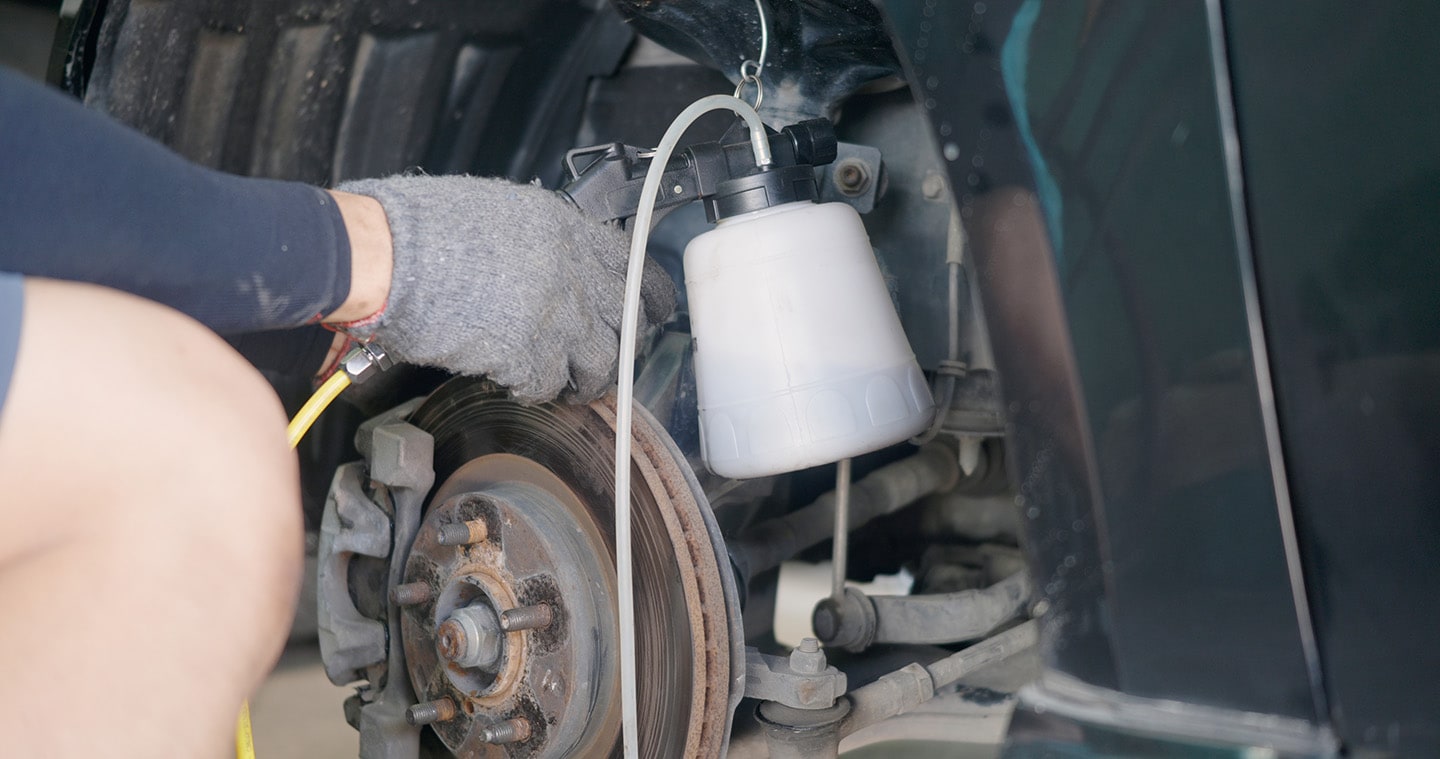
Pressure Bleeding
Pressure bleeding uses a pump to push brake fluid through the system. This keeps constant pressure and moves air out quickly.
You attach a pressure tank to the brake fluid reservoir. The tank forces fluid into the brake lines while you open bleed valves.
- Fill pressure tank with brake fluid
- Connect tank to brake fluid reservoir
- Pressurize tank as instructed
- Open bleed valves one at a time
- Close valves when fluid runs clear
Vacuum Bleeding
Vacuum bleeding pulls brake fluid and air out by suction. A vacuum pump attaches to the bleed valve to draw fluid through the system.
This method works well alone and keeps the fluid flow smooth. It reduces the chance of air going back into the brake lines.
- Attach vacuum pump to bleed valve
- Turn on pump to create suction
- Open bleed valve to let fluid flow
- Watch for air bubbles in the tube
- Close valve when fluid runs clear
Two-person Bleeding
This method needs two people. One presses the brake pedal, the other opens and closes the bleed valve.
It is similar to manual bleeding but requires teamwork. It works well for most cars and does not need extra tools.
- Person one presses brake pedal slowly
- Person two opens bleed valve to release air
- Close valve before pedal is released
- Repeat until no air bubbles appear
- Check brake pedal feels firm
Step-by-step Bleeding Process
Bleeding auto brakes removes air from the brake lines. This helps the brakes work properly and safely.
Follow these steps carefully to bleed your brakes and restore good brake pressure.
Locate Bleeder Valves
Find the bleeder valves on each brake caliper or wheel cylinder. These valves release air from the brake lines.
They look like small screws with a nipple for a hose. Use a wrench to open and close them.
Check Brake Fluid Level
Look at the brake fluid reservoir under the hood. The fluid should be between the minimum and maximum marks.
Add fresh brake fluid if the level is low. Keep the reservoir cap closed to avoid dirt entering.
Pump Brake Pedal
Press the brake pedal slowly several times. Hold the pedal down on the last press.
This action forces brake fluid and air toward the bleeder valve for release.
Open And Close Valves
Use a wrench to open the bleeder valve slightly while holding the brake pedal down. Fluid and air will escape.
Close the valve before releasing the brake pedal. Repeat this process until no air bubbles appear.
Monitor Fluid Clarity
Watch the fluid coming out of the bleeder valve. It should be clear and free of bubbles.
Cloudy or bubbly fluid means air is still in the line. Continue bleeding until fluid runs clear.
Repeat For Each Wheel
Move to the next wheel and repeat the bleeding steps. Usually, start with the wheel farthest from the master cylinder.
Work your way to the closest wheel to ensure all air is removed from the system.
Credit: www.chase.com
Post-bleeding Checks
After bleeding your car brakes, it is important to conduct some checks. These checks ensure your brakes function safely and effectively.
This process helps confirm the bleeding was successful and there are no issues. Follow these steps for a thorough post-bleeding inspection.
Brake Pedal Feel Test
Start by testing the brake pedal feel. Press the pedal gently with your foot. It should feel firm and not sink to the floor.
If the pedal feels soft or spongy, there might still be air in the system. Bleed the brakes again if needed to ensure safety.
Inspect For Leaks
Look around the brake lines and calipers for any fluid leaks. Leaks can cause brake failure, so it’s important to check thoroughly.
Use a flashlight to see clearly under the car. Check for any wet spots or drips on the ground.
Test Drive Tips
Take your car for a short drive to test the brakes in real conditions. Drive slowly and apply the brakes gently at first.
Listen for unusual noises or vibrations. If everything feels normal, your brakes should be in good condition.
- Drive in a safe, open area
- Pay attention to brake response
- Stop safely if there are issues
Common Issues And Solutions
Bleeding auto brakes is essential for safe driving. Many drivers face common issues during this process. Knowing these issues helps in finding solutions easily.
This guide explains problems like spongy pedals, fluid contamination, and valve troubles. Learn how to address these issues to keep your brakes in top condition.
Persistent Spongy Pedal
A spongy brake pedal feels soft when pressed. This often means air is trapped in the brake lines. It can make stopping difficult and unsafe.
To fix this, bleed the brakes correctly. Ensure all air is removed. Consistent pressure is key while bleeding. This restores firmness to the brake pedal.
Brake Fluid Contamination
Contaminated brake fluid can cause serious problems. Dirt and moisture degrade the fluid. This affects brake performance and can lead to corrosion.
Change the brake fluid regularly. Use fresh, clean fluid for the best results. Check for leaks that might introduce contaminants.
- Check fluid color; it should be clear or light amber
- Avoid mixing different types of brake fluid
- Seal the fluid container tightly after use
Bleeder Valve Problems
Bleeder valve issues can hinder brake bleeding. These problems include clogged or stuck valves. They prevent effective air and fluid removal.
Inspect valves before bleeding. Clean or replace them if needed. Use the correct tool to open and close valves gently.
| Problem | Solution |
| Clogged valve | Clean with wire brush |
| Stuck valve | Apply penetrating oil |
| Damaged threads | Replace valve |
Credit: www.clickmechanic.com
Maintenance Tips For Brake Systems
Keeping your car’s brakes in good shape is very important. Proper brake maintenance helps your car stop safely and lasts longer.
One key task is bleeding the brakes. This removes air from the brake lines and keeps the brakes working well.
Regular Fluid Checks
Brake fluid is the lifeblood of your brake system. It transfers pressure from the pedal to the brakes.
Check the brake fluid level often. Low fluid can cause poor brake performance or damage the system.
- Look at the brake fluid reservoir under the hood
- Make sure the fluid is clear, not dark or dirty
- Fill with the correct brake fluid type if low
- Replace brake fluid every 1-2 years as recommended
Scheduled Brake Inspections
Have a mechanic inspect your brakes regularly. This keeps the system safe and reliable.
Inspections can find worn parts or leaks early. They help avoid costly repairs and accidents.
- Check brake pads and shoes for thickness
- Inspect brake lines for cracks or leaks
- Test brake pedal feel and response
- Examine rotors and drums for damage
Frequently Asked Questions
How Do I Know When To Bleed My Auto Brakes?
You should bleed auto brakes if the brake pedal feels spongy or soft. Air trapped in brake lines reduces braking efficiency. Regular maintenance or after replacing brake components also requires bleeding. This ensures safe, responsive braking and prevents brake failure.
What Tools Do I Need To Bleed Auto Brakes?
You need a brake bleeder kit, wrench, clear tubing, and a container. Also, keep fresh brake fluid compatible with your vehicle. Safety gloves and goggles are recommended. Proper tools ensure a smooth, safe bleeding process and prevent contamination.
Can I Bleed Auto Brakes By Myself Safely?
Yes, you can safely bleed brakes yourself with proper instructions. Follow the correct sequence, use the right tools, and work carefully. If unsure, consult a professional to avoid brake system damage or safety risks.
How Long Does It Take To Bleed Auto Brakes?
Bleeding auto brakes typically takes 30 to 60 minutes. Time depends on your experience and the vehicle’s brake system complexity. Taking your time ensures all air is removed for optimal brake performance.
Conclusion
Bleeding your auto brakes keeps your vehicle safe and responsive. Follow each step carefully to avoid mistakes. Use the right tools and fresh brake fluid every time. Check for air bubbles until the brake pedal feels firm. Regular brake maintenance helps prevent costly repairs later.
Take your time and stay patient throughout the process. Your car will stop better and give you peace of mind. Safe driving starts with good brake care. Try this simple task to keep control on the road.